Yes. I'm terrible at writing blog posts about my knitting in a timely manner. We all know that. Now, as I'm in the throes of my 2014 X-mas knitting, let's take a look at what hand-made goodies I made for my family last year!
X-mas 2013 was all about the socks. My dad was the lucky recipient of the Guitar Man Socks, a lovely pattern designed by Rebecca Mercier. They were an easy, almost-mindless knit, but with enough complexity in the pattern to prevent it from getting boring. The yarn I used was Knit Picks Stroll Tweed in the colourway Autumn Heather. Let me say it now: if you haven't yet knit with this yarn, it's an absolute must. It's lovely and soft and the little flecks are so pretty! Highly recommended.
For my little brother, I knit the Vihtory socks by Heli Heikkilä, also a very lovely pattern. One word of warning, if you're a fan of the two-at-a-time magic loop technique for socks: after knitting the foot of the sock, where the cables are only on the top of the foot, and turning the heel, the cables go all the way around, which is impossible to work two at a time. I switched to knitting the socks separately at this point. The yarn used is Diamond Luxury Collection Soxy (unfortunately discontinued) in the aptly named Charcoal Space Dyed colourway. I picked up this yarn during my trip to Victoria, BC several years ago where I visited the Beehive Wool Shop.
I'll admit to having gone a little insane with all the sock knitting last X-mas, especially since the men in my life have such large feet. The largest-footed of all is the boyfriend, whose shoe size comes in at a whopping 12 men's. I'll also admit that these socks didn't actually get finished until mid-February. They were, however, meant as an X-mas gift, so I'm still counting them. They are just plain stockinette socks with the snail added on with duplicate stitch, using this chart. I again used Stroll Tweed in the Wellies Heather colourway, which made the knitting bearable. And they were a huge success! The boyfriend has declared these his favourite socks. I call that a win.
Now, I had also knit socks for my friend Ed using the Lucky Stripes pattern by Tofutrulla, an interesting striped sock pattern which gets you to roll a die to determine how many rows of each colour to knit between colour changes. I did not, however, get pictures of them, since I was knitting the last few rows and binding off moments before they were gifted.
The final bit of X-mas knitting was not socks, but instead a hat for my cousin. I used the Declan's Hat pattern by Samantha Kirby, which was absolutely lovely. It starts off easily, and just as that ribbing starts to get boring, the crown is all fun and cabley. I've knit this pattern for myself since. The yarn is good old Cascade 220 in Light Grey which I had left over from another project.
And that's it for my 2013 X-mas knitting! Hopefully the projects currently in progress will take less than 12 months to show up on the blog!
Crochet, knitting, astronomy & life in general.
Monday, December 22, 2014
Thursday, December 4, 2014
SPIDER: A balloon-borne telescope
At this very moment, a team of astronomers is braving the Antarctic summer weather (which is just as bad, if not worse, as winter here in Toronto) for SCIENCE! The experiment called SPIDER (which I mentioned in a previous post) is a balloon-borne telescope designed to measure the polarization of the Cosmic Microwave Background (CMB), the light left over from the Big Bang. It will be launched later this month to commence a 20-day journey around the Antarctic continent in order to collect light from the CMB and to try to look for the pattern of ripples in space-time produced from the Big Bang itself.
Among these intrepid scientists are a few of my colleagues from the University of Toronto. My friend Jamil is taking some gorgeous photos of SPIDER's assembly, as well as of the breathtaking Antarctic landscape. He was also interviewed on the CBC's Metro Morning and gave a wonderful explanation of what the project is all about. It's well worth a listen.
Finally, if you want to learn more about this really cool project, you should check out the SPIDER blog, set up by the Princeton contingent of the team. There you'll see how the telescope is being assembled, and get a unique snapshot into the lives of people currently living in Antarctica.
Labels:
astronomy
Thursday, November 13, 2014
A Three-Month Bullet Journaling Update
I've managed to stick with this bullet journaling thing for just about three and a half months now (see my first post here), and so far, I can say that I'm enjoying the process! I've made a few modifications from the original system since I started, and will probably continue to do so as I customize it to best fit my own lifestyle.
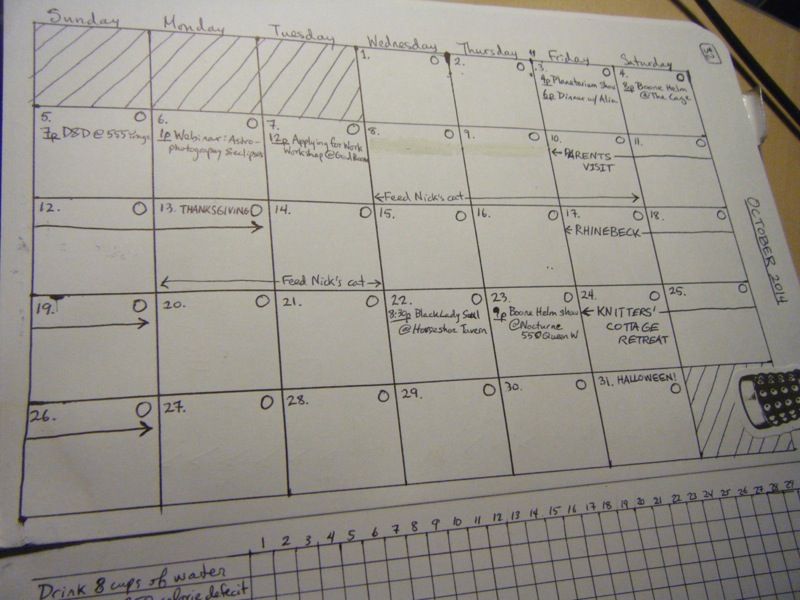
The first customization I made was to change the monthly layout to a more traditional calendar view. I wasn't a huge fan of the list since it ended up being a little messier/cramped than I like, and it was difficult to show events that spanned several days. I also like seeing at a glance what day of the week it is, and how the weeks relate to each other. Some bullet journal users claim that the calendar view doesn't give enough space to write down events, but I didn't have a problem with that. And it's kind of fun to draw boxes with a ruler. Here's what my calendar looked like for October (note the use of arrows to show multi-day events):
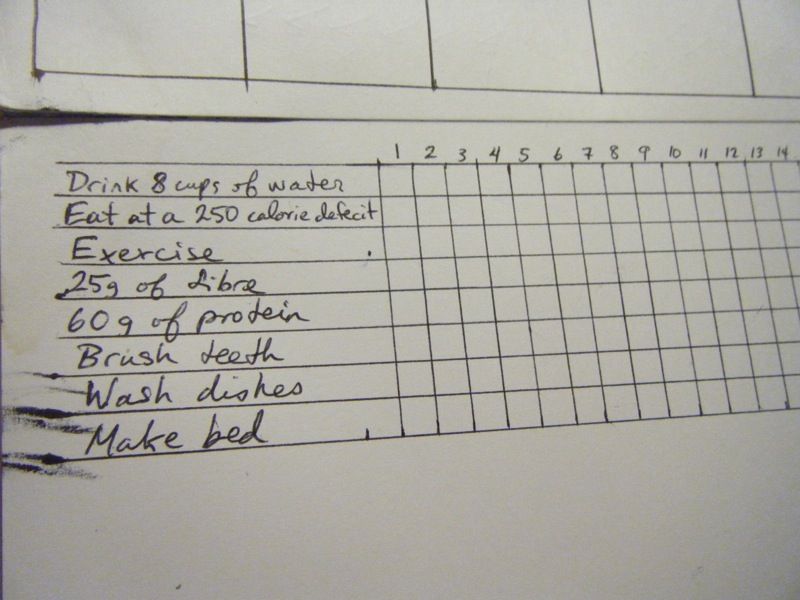
I also added a habit tracker to my monthly spread to keep track of stuff that I should be doing daily. It's basically just a list with checkboxes for each day. I'll admit that I still haven't been great at checking all those boxes (i.e. I still don't make my bed every day), but it has helped me be a bit more accountable.
Besides that, I've added a few more lists: stuff to buy, tutoring contacts, fun quotes, and birthdays and anniversaries. Although my current dollar-store notebook has served me well for learning how to bullet journal, I'm enjoying the process so much that I've even already invested in a fancy new notebook: a Cottonwood Dot Matrix notebook. It's gorgeous and has a built-in pen loop! (I tried to make my own pen loop out of tape for my current notebook and it looks pretty crappy.) I can hardly wait to try it out at the end of the month!
Labels:
journaling,
life
Sunday, November 9, 2014
A Pilgrimage to Yarn Mecca
Folks, I have been to the place all fibre enthusiasts hope to someday visit: The Duchess County Sheep & Wool Festival, more colloquially known as Rhinebeck. I'll admit that it was everything I could have hoped for… Hundreds of yarn and yarncraft-related vendors, lots of adorable fibre animals, a ton of delicious foods to sample, not to mention the thousands of knitters to chat with and whose knitwear I could admire.
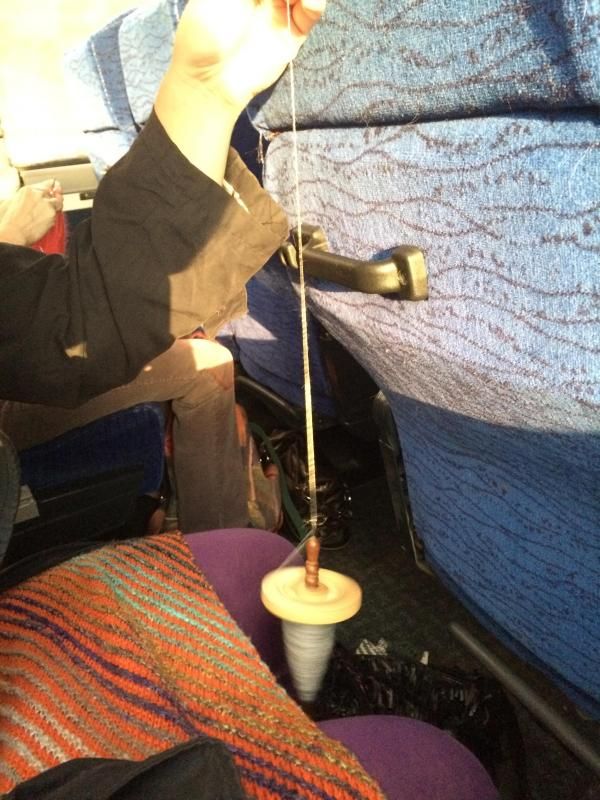
For my first trip to Rhinebeck, I went the easy route and joined a busload of Toronto-region knitters, including my good buds Joanna (see her blog post here), Erin (who also wrote a blog post about the trip), and Kate. It was a long bus ride, but I got a lot of sleeping, reading, knitting, and drop-spindling done. Here's an action shot of the bus drop-spindling action:
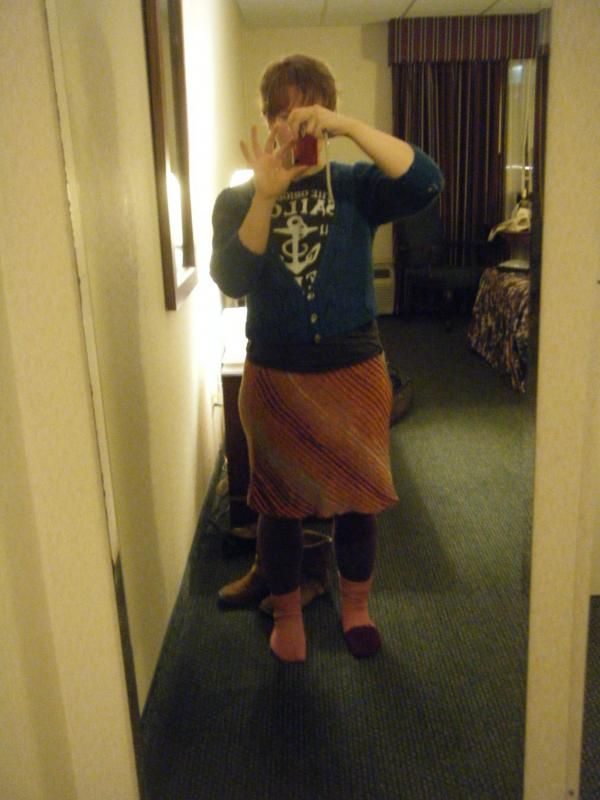
After a long bus ride from Toronto, we arrived at our hotel just outside of the town of Rhinebeck in the early evening. I felt I had to take a picture of my knitted outfit, which included knitwear from three generations of knitters: the socks were made by my grandmother, the sweater by my mom, and I knit the Lanesplitter skirt back in 2012.
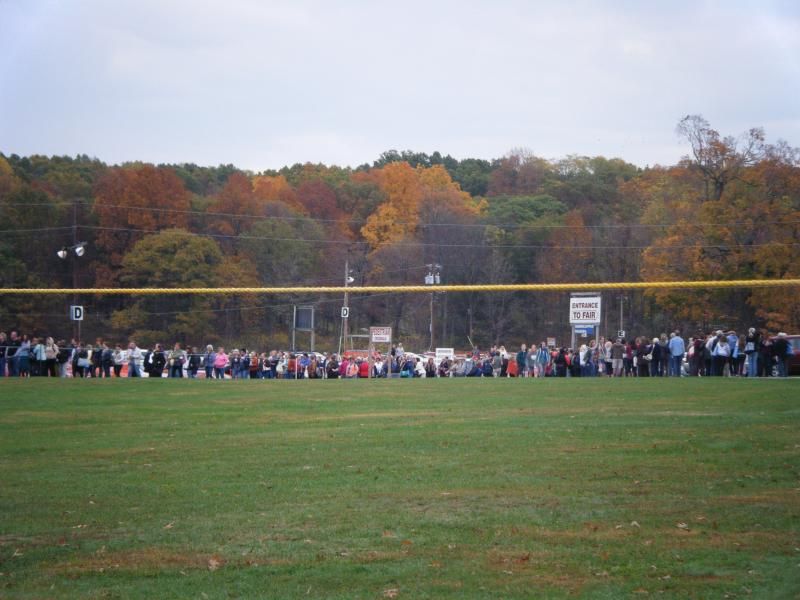
The next morning, we arrived 30 minutes before the opening of the festival only to find the mother of all lineups (and some beautiful fall colours).
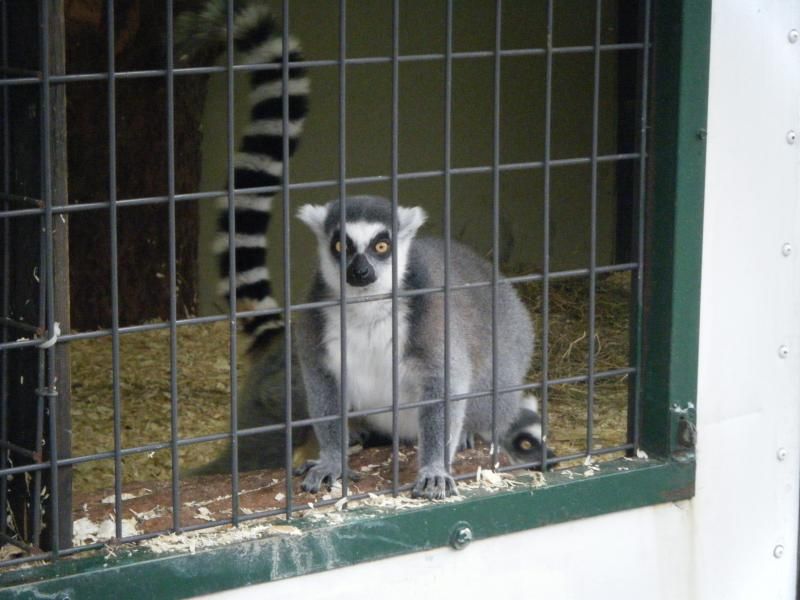
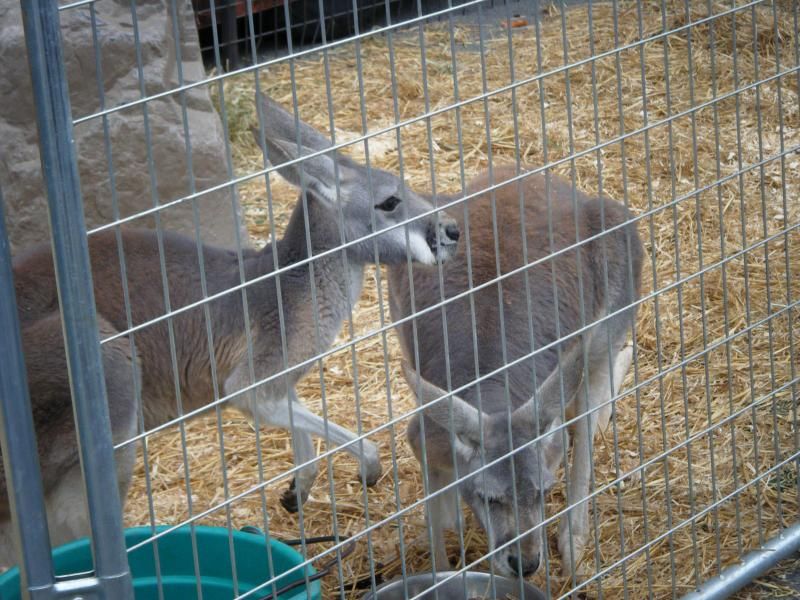
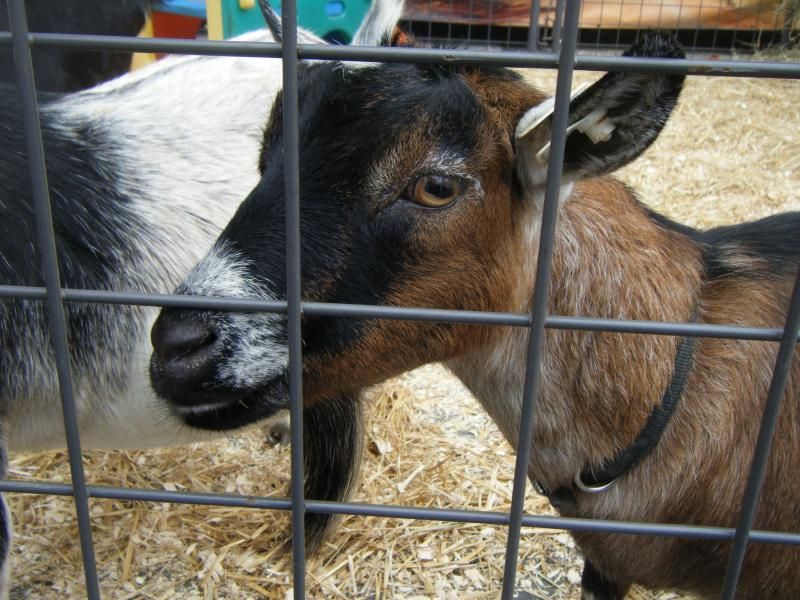
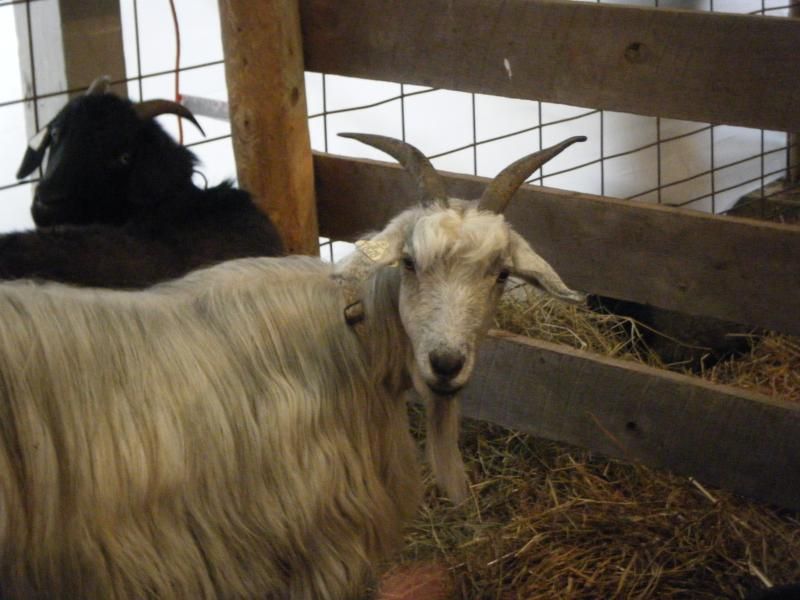
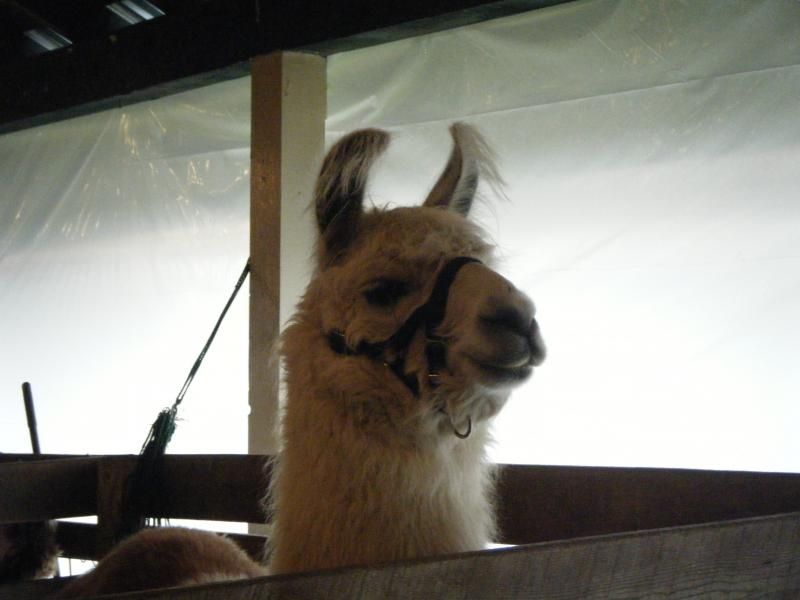
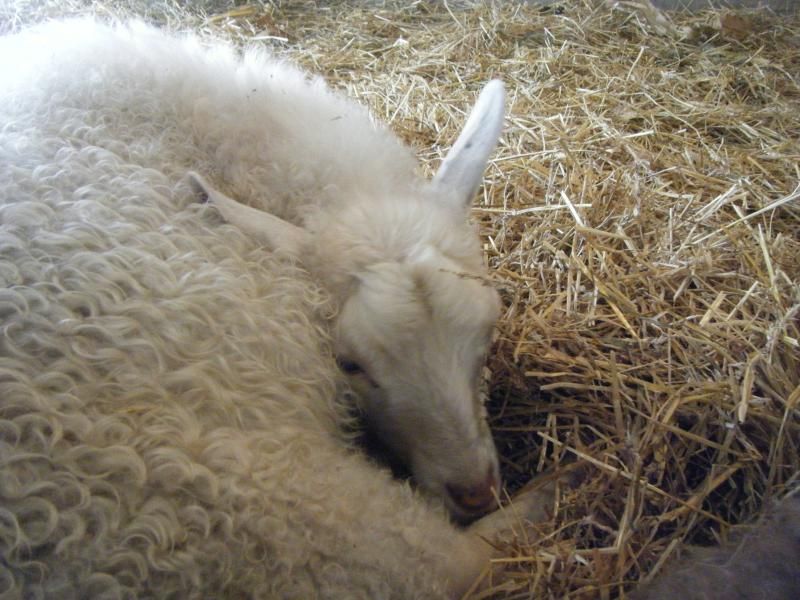
Fortunately, it didn't take long for everyone to get in once the gates were opened, and we were soon greeted by some cute furry friends! In fact, the whole festival was full of adorable fibre animals, and I more than once considered taking one home with me… Here are a few of them:
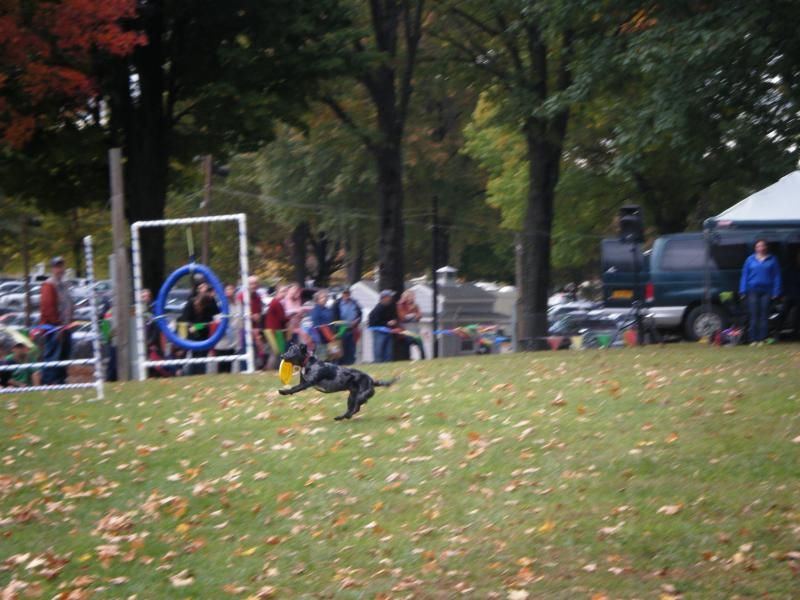
For me, the main draw of the festival was the demonstrations. I figured, since I'd come all this way, I should learn something more about my craft or about fibre-related things in general. Seeing all the different types of fibre animals helped with that goal, certainly, but there were also a ton of other interesting things to watch. I just missed the sheep-shearing demo I'd hoped to see, but I got to watch a canine frisbee demo (adorable!):
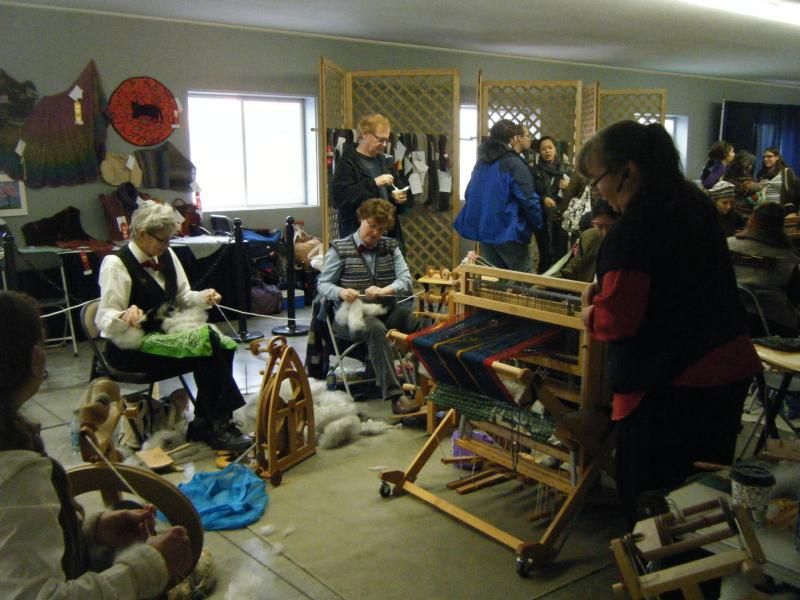
The Fleece-to-Shawl competition took place on Sunday morning, and there were more spinning wheels and looms in operation than I'd ever seen in one spot. The idea is, in three or four hours, to prepare the fibre from a fleece, spin it into yarn, and then weave it into a shawl:
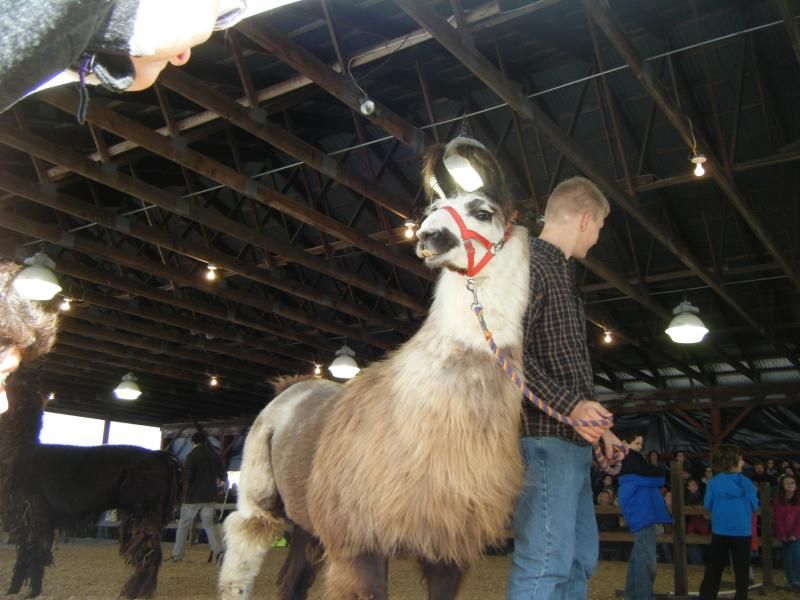
The ultimate high point for me was the Leaping Llama competition! I would have loved to watch the whole thing, but our tour bus would have left without us… The place was so packed that I didn't get any good photos, but here's a proud-looking fellow about to show us all what a good leaper he is:
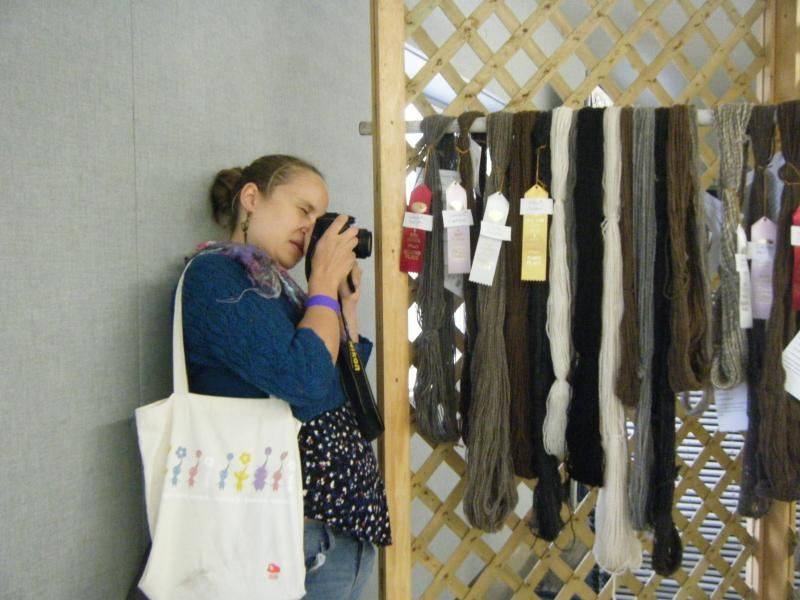
After all is said and done, one of the highlights for most visitors to Rhinebeck is the shear (if you'll excuse the pun) volume of vendors at the festival. There were at least 10 huge buildings devoted to shopping, with some vendors spilling out onto the pathways between buildings. I showed amazing restraint, and somehow managed to spend less than $100 (USD) on goodies. There was so much I could have brought home with me! First, here's Joanna enjoying the view of some award-winning handspun:
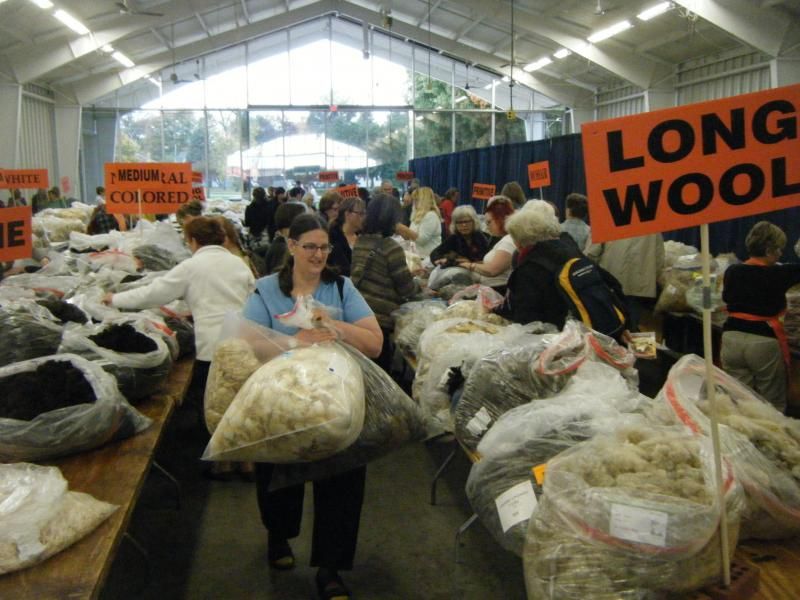
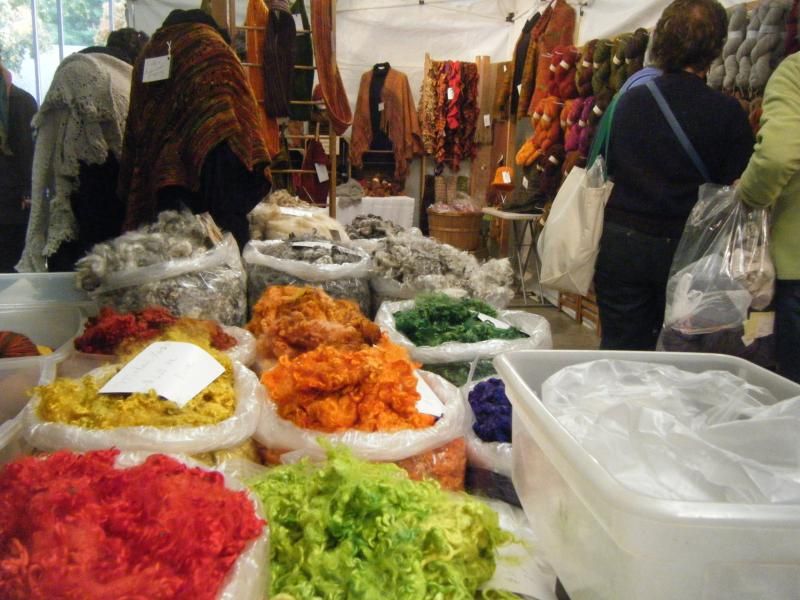
A whole room devoted to fleece:
The best-tasting apple cider donut you'll ever have:
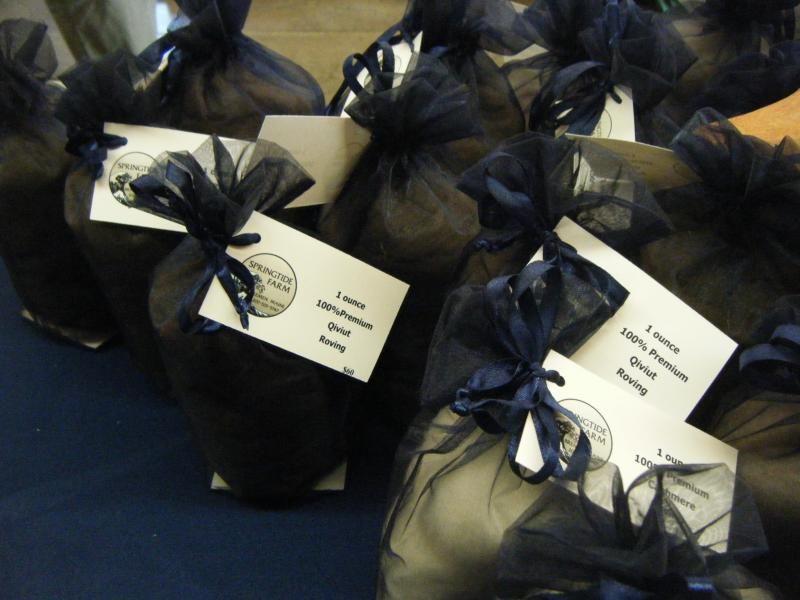
Some expensive spinning fibre (Qiviut, $60 for 1 oz):
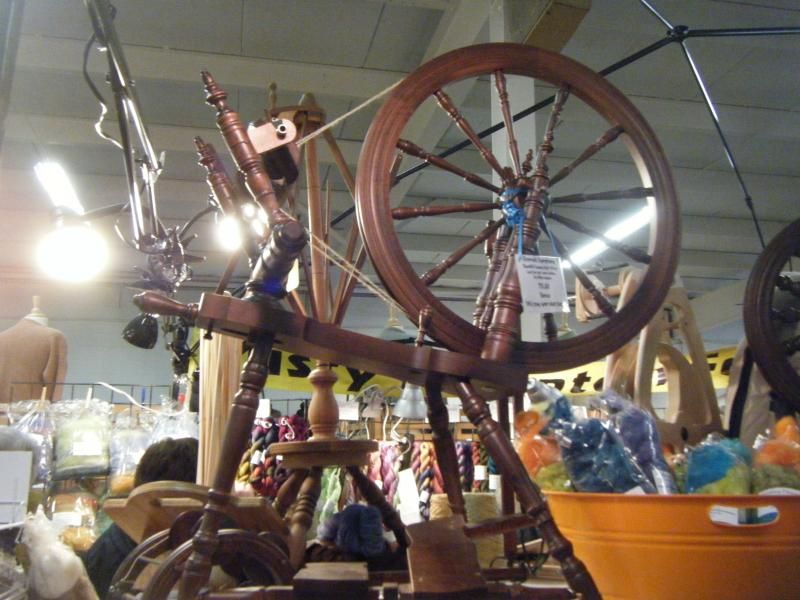
And some very pretty spinning fibre and tools:
Last but not least, here's the obligatory loot shot. Surprisingly, I didn't buy any yarn! Clockwise from the bottom left: Official Rhinebeck project bag and zipper dangle, Goat's Milk soap from Cat's View Farm, Forbidden Fruit apple wine from Pazdar Winery, Maple Syrup from a New York sugarbush, Shetland roving from Autumn House Farm, cotton roving from The Wool Room, a "Susan" lightweight drop spindle by David Reed Smith, and "Second Quality" (which I had to card to make spinnable) angora fibre from Cozy Rabbit Farm.
I was so inspired by the whole trip that I'd love to make another pilgrimage next year! (And we're already looking at nearby B&B's!)
Wednesday, October 8, 2014
So do black holes exist or not?
The internet has been all aflutter this past couple of weeks with the news that black holes have supposedly been mathematically proven not to exist. The trouble all started earlier this year when Stephen Hawking declared that the existence of an event horizon, the region around a black hole past which even light cannot escape, is incompatible with quantum mechanics. (You can read the original paper here if you feel you can handle the jargon.) Now, physicist Laura Mersini-Houghton, in a recent paper (not yet peer-reviewed) is claiming that black holes would not be able to form when dying stars collapse, which is the primary mechanism astronomers use to explain the existence of stellar mass black holes (those that are a few times more massive than the sun).

By Oliver Krause (Steward Observatory) George H. Rieke (Steward Observatory) Stephan M. Birkmann (Max-Planck-Institut fur Astronomie) Emeric Le Floc'h (Steward Observatory) Karl D. Gordon (Steward Observatory) Eiichi Egami (Steward Observatory) John Bieging (Steward Observatory) John P. Hughes (Rutgers University) Erick Young (Steward Observatory) Joannah L. Hinz (Steward Observatory) Sascha P. Quanz (Max-Planck-Institut fur Astronomie) Dean C. Hines (Space Science Institute) [Public domain], via Wikimedia Commons
Our current theory of stellar mass black hole formation is that these objects are created when a star goes supernova due to the collapse of its core. When a star is about 8 times more massive than our Sun, it is able to fuse heavier and heavier elements, working its way along the periodic table, until it starts producing iron. The problem with iron fusion is that it's an endothermic reaction, taking in energy, instead of an exothermic reaction, giving off energy, such as when the fusion of lighter elements occurs. Thus, the outward pressure coming from fusion reactions that would counteract gravitational collapse is no longer present. When enough iron builds up in the core, it collapses in on itself either into a neutron star, or, if the original star was at least 20 times as massive as the sun, a black hole. The outer layers of the star would then collapse inward as well, having nowhere to go, and reach a critical temperature which would cause them to explode outward as an extremely energetic supernova. (PhD Comics made a nice video explaining this.) The image you see above is of Cassiopeia A, the remnant of a supernova which was thought to produce a black hole.
The basic idea of this new paper comes from Stephen Hawking's calculation in the 1970s that showed that black holes should emit thermal radiation (called hawking radiation). Essentially, quantum fluctuations in a vacuum might sometimes produce a pair of particles. If this happens near the event horizon of a black hole, due to the gravitational energy of the singularity, one of the particles will fall in, and the other will escape, causing the black hole to lose energy, and therefore mass. Mersini-Houghton claims that the amount of hawking radiation produced during the collapse of a massive star's core is so much that the black hole would never be able to form. Essentially, the black hole would evaporate away before it got a chance to come into being, and this would mean that stellar mass black holes can't form.
Bob Novella of the Skeptic's Guide to the Universe does a pretty good job of deconstructing why this research might not make that much sense in reality (see part 1, and part 2). The first, most obvious counter-argument is that we do, in fact, observe evidence of stellar mass black holes in our galaxy. Many of these are in what we call X-ray compact binary systems, where a black hole is in a binary system with a star from which it is cannibalizing material. The material falling in towards the black hole releases so much energy that it is seen to radiate in the X-ray spectrum of light. The second argument is that many physicists who specialize in black holes are skeptical (to put it mildly) about the results of this paper, including Bill Unruh who has proclaimed that this paper is "nonsense".
Now, I will admit that I have a small personal investment in this topic in that my thesis supervisor, Harald Pfeiffer, is the second author on Mersini-Houghton's paper. He is an expert numerical relativist and I have no doubt that his numerics are sound. The problem is most likely the assumptions made prior to any numerical simulation. At any rate, the topic of my doctoral thesis (which I might write about someday) depends on the existence of stellar mass black holes, so I certainly hope that they're wrong in this case!
One final point I'd like to make is that although this paper claims that the mechanism for producing stellar mass black holes would not work, it says nothing about the formation of other types of black holes, that is, supermassive and intermediate-mass black holes. Both of these have been found to exist, the former in the core of almost every galaxy, and the latter at the centre of globular clusters. In particular, there is ample evidence that supermassive black holes exist, especially from the observation of the movement of stars at the centre of our own galaxy. It's exceedingly irresponsible for popular science articles to claim that this research shows that any type of black hole can't exist. And so, the short answer to the question posed in the title of this post: "Yes, they probably do."
Labels:
astronomy
Tuesday, September 23, 2014
Thrifty Knitting: Using T-shirt Yarn
I have trouble throwing anything out. I got a lot better at it during our move, since getting rid of something I hadn't used in five years made more sense than packing it up, but I have to say that keeping things "just in case" is definitely still part of my mentality. I would rather find a way to re-use or re-purpose something than just throw it away. For that reason, I still have a pile of the boyfriend's old shirts that I plan to make into a dress, and a big ziplock bag full of can tabs that I eventually plan on making into a purse. Someday… someday…
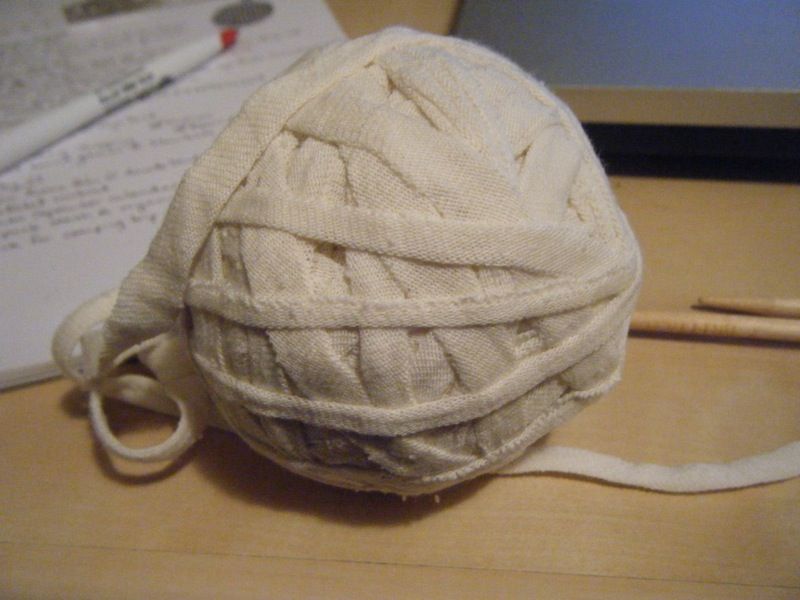
Because I participate in a whole bunch of science outreach events, I tend to end up with a lot of free t-shirts, most of which end up languishing in the bottom of my drawer. In an attempt to satisfy my aversion to waste, I decided to convert some of them into t-shirt yarn! I don't have any pictures of the process, unfortunately, but I followed the instructions posted by Fuck Yeah Craft! (Pardon my french!) I ended up with one ball of yarn from an extra-large t-shirt:
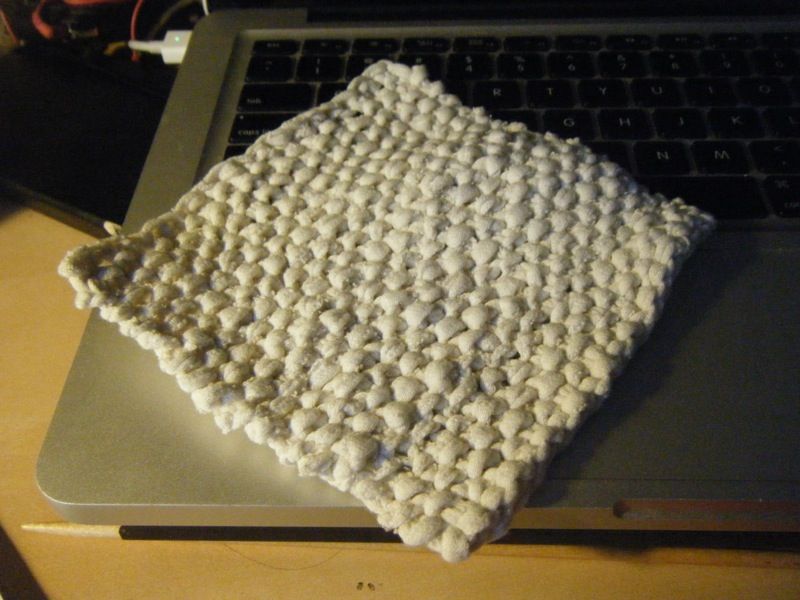
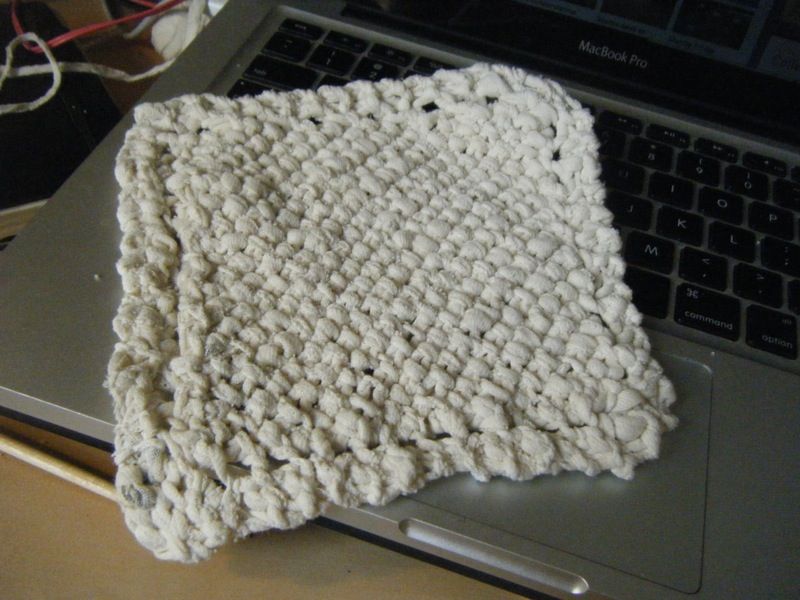
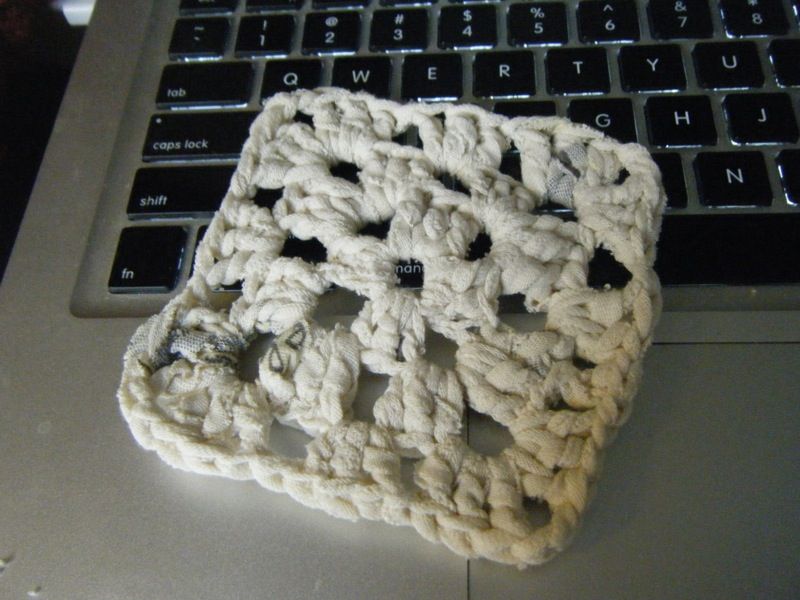
I'll admit I didn't weigh it, so I have no idea how much it is in terms of grams or yardage. The weight was approximately worsted, sometimes a little thicker, and sometimes a little thinner. However, I do know that it was just enough to make two 6-inch dishcloths and one 3-inch coaster:
The first dishcloth is just a simple square knit in seed stitch, the second one is a diagonally knit Grandmother's Favourite Dishcloth with seed stitch instead of garter stitch, and the coaster is just a little granny square.
The verdict? Knitting with t-shirt yarn is fairly easy. It has the same stretch as a wool yarn and is pretty soft. My only complaint is that it sheds a lot. My desk ended up with little fluff grains all over it. As for the finished product, so far the dishcloth I'm using to wash the dishes every day is holding up very well. The fabric is very sturdy. So if you have some old t-shirts lying around that you don't wear any more, I'd highly recommend this as a way to re-purpose them!
Monday, September 15, 2014
New Home Sweet Home
I mentioned in a previous post that the boyfriend and I moved at the end of July. Now that we're pretty settled in the new place, it's about time I told you a bit about it!
We'd been living at the same apartment for just about six years, ever since we moved to Toronto. It wasn't bad for what we were paying: a two-bedroom apartment on the 6th floor of a 1950s-era building with a great view out of our West-facing window. But we had no balcony, no control over the temperature, and laundry was all the way down in the basement at an extra cost. On top of that, the property management company made it clear that they wanted us out so they could renovate our apartment and charge the new tenants several hundred dollars more a month. And so, when the opportunity to move to a real house with a back yard, in-suite laundry, and central air came up for only a small increase in rent, we jumped at it.
At the end of July, we loaded all our belongings into a big ol' truck (with considerable help from our friends) and officially changed address! This is our new home:
We live on the main floor while our landlord occupies the basement. We have two bedrooms, and the square footage is approximately the same as our old apartment. The house has the same construction as many bungalows built in the early 1950s, post-WWII. The kitchen and living room are in the front, and the two bedrooms are in the back, with a side door near the front and narrow staircase that leads to the basement (where the laundry machines are a kept). Here's the living room, complete with fake fireplace:
And here's our new kitchen (ignore the boxes that still need to be unpacked in the back room):
There's an opening in the wall between the kitchen and the living room, making the whole place feel very open, and probably larger than it actually is.
The real selling point, for me at least, was the back yard:
As you can see, we have access to a brand new barbecue, which we have used quite a bit. The yard has a few square metres of grass, but the best part is the amazing garden. We've been told to help ourselves to it! Here's just under half of it:
Those tomato plants are so heavy, they've toppled their support sticks. The garden includes at least five or six varieties of tomatoes, zucchini, cucumber, many different types of hot pepper, kale, swiss chard, spearmint, sage, red onions, and probably much more that I'm forgetting. I've been especially enjoying the cherry tomatoes:
There's also a giant zucchini, which reminds me a little of a sleeping beast (at the time this picture was taken, it was about 2 feet long -- now it's at least a foot longer!):
Labels:
life
Friday, September 5, 2014
A very patriotic send-off: recreating the CBC sweater
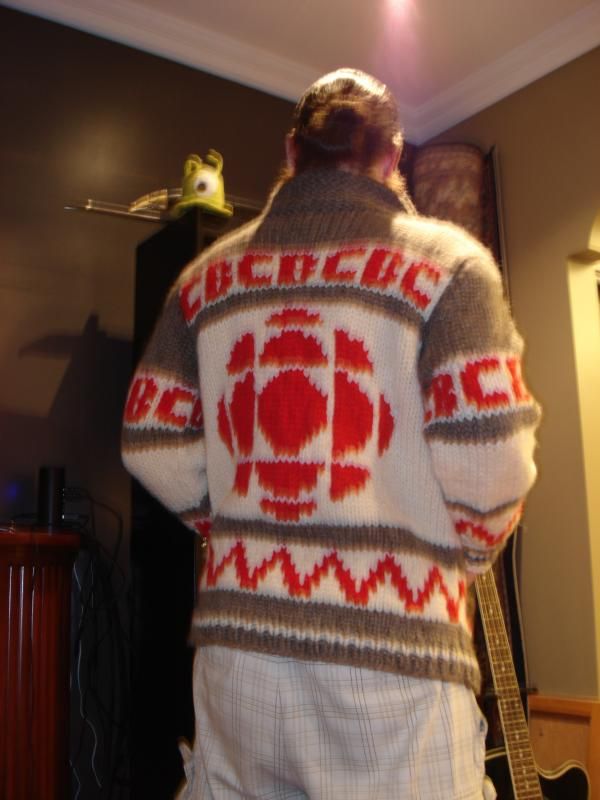
A very dear friend of mine will be moving to London, England in a couple of days to pursue a PhD and to embark upon a great adventure. Several months ago, she asked me to knit her a sweater which would make it impossible for any Brit to mistake her for American. She suggested the CBC sweater, conceived of by Granted Clothing and originally knit for a brother-in-law who had also moved to England. Here is the original sweater:
After having agreed to knit it (and arranging to get a fair bit of her furniture in return), I did a bit of research to see if anyone else had come up with a pattern for this sweater. Alas, Natalie Bursztyn had come up with a pretty good facsimile, but it lacked the authenticity I sought. Eventually, I decided to make up my own pattern, eyeballing the intarsia from the photographs and guessing at how to put it together as I went along. Were I to do it again, I would likely change a few things, but I'm fairly happy with the results. Here's the finished product in all its Canadian glory:
And the back:
I may or may not publish some charts of each design here whenever I get around to it (and maybe even a full pattern!), but I'll give a brief description of how I went about making the sweater now. I started off knitting the sweater in pieces, two fronts and a back, with sort-of intarsia where I would carry the yarn behind for the design. Were I to knit this sweater again, I would likely do the bobbin thing with fewer floats, since the colour work parts tended to be twice as thick as the solid colour bits. I would also knit it as a single piece for the body because seaming is annoying.
I ended up seaming up the fronts and backs to make a vest and then picking up stitches around the arm holes to make the sleeves, with a bit of short-row shaping to decrease underarm bulkiness. For the collar, I picked up stitches from the front and the back, and knit in garter stitch until it looked about right. The fronts were finished with a single-crochet border to which I sewed the zipper.
The most harrowing part was making the pockets. I'd forgotten to put in the waste yarn normally required to make an afterthought pocket, and so instead cut one stitch and unravelled the stitches as wide as I wanted the pocket to be. I then followed these instructions to knit the pocket from the live stitches. Here is the result:
The yarn, by the way, is Briggs & Little Country Roving, which was like nothing I'd ever knit with before. It's very loosely spun (if it's really spun at all), and very thick and squishy. It might have made for a sweater that was a tad larger than I expected. My friend was swimming in it, and it fit the 6'2" boyfriend perfectly:
Heck, maybe if he plays his cards right, he might get one too!
Labels:
knitting
Friday, August 29, 2014
Gaia and the Cosmic Distance Ladder
I first heard about Gaia (Global Astrometric Interferometer for Astrophysics) during my undergraduate studies around 8 years ago. Although the impending space mission was hailed as one of the most important of the 21st century, it seems like it hasn't received nearly enough press in the last little while, which is why I wanted to talk about it in this blog post. The Gaia spacecraft was first proposed in 1993, on the coat tails of the Hipparcos mission, and was finally launched in December of 2013. And, as of a European Space Agency press release on July 29th, Gaia is now ready to do science!
Gaia's motives range from discovering extra-solar planets to detecting quasars, but its most important purpose, in my opinion, is to precisely measure the distance to over 200 million stars within our galaxy to an accuracy of 10%, and out to a distance of 30,000 light years, well beyond the Milky Way's galactic centre. These distance measurements are obtained through a process called stellar parallax, where the apparent motion of a star is observed compared to more distant background stars as the Earth moves around the Sun.

Credit: "Stellarparallax2" by Original uploader was Booyabazooka at en.wikipedia - Originally from en.wikipedia; description page is/was here.. Licensed under Public domain via Wikimedia Commons.
Not only will the precise determination of the distance to this many stars in the Milky Way provide us with a detailed representation of the structure of our galaxy, but parallax is the most important fundamental measurement in the cosmic distance ladder. The cosmic distance ladder (or CDL) is a series of methods for determining distances in the cosmos which are calibrated to each other to greater and greater distances. The first rung in the CDL is the distances within our own solar system, which have been determined to great accuracy with radar. Once the Earth-Sun distance is determined precisely, accurate parallax measurements can be made.
The next rung on the CDL is a class of objects called a Standard Candles. These are objects which have a known brightness, and therefore, when their apparent brightness is observed, one can calculate how far they are (sort of like figuring out the distance of a car based on how bright its headlights look). A couple of famous examples of standard candles are Cepheid Variables and Type Ia Supernovae, which are used to calculate the distance to objects much further than can be achieved with parallax (such as with distant galaxies). However, in order to calibrate the intrinsic brightness of these objects, the distance to nearby standard candles must be computed via some fundamental measurement, such as parallax. Thus, having accurate parallax measurements for nearby objects allows astronomers to determine the distance to bodies which are much further away.
It becomes apparent, when the determination of distance to far-away objects must be calibrated in this way, that an error in a lower rung of the CDL can seriously affect the distance measurements to very faraway galaxies. This problem became clear in the early 20th-century when Edwin Hubble was making his first distance measurements to nearby galaxies. When he discovered that the Universe is expanding, he calculated the age of the Universe to be only about 2 billion years, which was a problem because the age of the Earth had been estimated to be at least 3 or 4 billion years! This was later resolved when the brightness of Cepheid Variables was properly calibrated, which more than doubled the calculated age of the Universe. We now know the age of the Universe to be 13.8 billion years, and the value is mostly obtained from the distance measurements of far-off galaxies.
In conclusion, accurate distance measurements to objects within our own galaxy can have implications for our understanding of the history of the Universe! Even though the primary purpose of Gaia is to map out the structure of our galaxy, it will have a great impact on our knowledge of cosmology.
Gaia's motives range from discovering extra-solar planets to detecting quasars, but its most important purpose, in my opinion, is to precisely measure the distance to over 200 million stars within our galaxy to an accuracy of 10%, and out to a distance of 30,000 light years, well beyond the Milky Way's galactic centre. These distance measurements are obtained through a process called stellar parallax, where the apparent motion of a star is observed compared to more distant background stars as the Earth moves around the Sun.
Credit: "Stellarparallax2" by Original uploader was Booyabazooka at en.wikipedia - Originally from en.wikipedia; description page is/was here.. Licensed under Public domain via Wikimedia Commons.
Not only will the precise determination of the distance to this many stars in the Milky Way provide us with a detailed representation of the structure of our galaxy, but parallax is the most important fundamental measurement in the cosmic distance ladder. The cosmic distance ladder (or CDL) is a series of methods for determining distances in the cosmos which are calibrated to each other to greater and greater distances. The first rung in the CDL is the distances within our own solar system, which have been determined to great accuracy with radar. Once the Earth-Sun distance is determined precisely, accurate parallax measurements can be made.
The next rung on the CDL is a class of objects called a Standard Candles. These are objects which have a known brightness, and therefore, when their apparent brightness is observed, one can calculate how far they are (sort of like figuring out the distance of a car based on how bright its headlights look). A couple of famous examples of standard candles are Cepheid Variables and Type Ia Supernovae, which are used to calculate the distance to objects much further than can be achieved with parallax (such as with distant galaxies). However, in order to calibrate the intrinsic brightness of these objects, the distance to nearby standard candles must be computed via some fundamental measurement, such as parallax. Thus, having accurate parallax measurements for nearby objects allows astronomers to determine the distance to bodies which are much further away.
It becomes apparent, when the determination of distance to far-away objects must be calibrated in this way, that an error in a lower rung of the CDL can seriously affect the distance measurements to very faraway galaxies. This problem became clear in the early 20th-century when Edwin Hubble was making his first distance measurements to nearby galaxies. When he discovered that the Universe is expanding, he calculated the age of the Universe to be only about 2 billion years, which was a problem because the age of the Earth had been estimated to be at least 3 or 4 billion years! This was later resolved when the brightness of Cepheid Variables was properly calibrated, which more than doubled the calculated age of the Universe. We now know the age of the Universe to be 13.8 billion years, and the value is mostly obtained from the distance measurements of far-off galaxies.
In conclusion, accurate distance measurements to objects within our own galaxy can have implications for our understanding of the history of the Universe! Even though the primary purpose of Gaia is to map out the structure of our galaxy, it will have a great impact on our knowledge of cosmology.
Labels:
astronomy
Thursday, August 14, 2014
Bullet Journaling for a more productive life
Folks, so, so, so much has happened since I last wrote! First, the Relay for Life was a great success (you can read my buddy Erin's recap for a good summary). I also picked up a part-time job at a math tutoring centre called Mathnasium (I actually started end of February, but it's still news!), and then, mid-June, we found out about a really gorgeous house for rent that was actually within our price range. I'm talking back yard, in-suite laundry, central A/C… the whole nine yards! So, at the end of July, we moved! I promise to write a post about our new home, but perhaps when it's a little neater after we've unpacked a bit more.
So, here we are, in a new home for just about two weeks, still with what seems like a gazillion boxes left to unpack (though I have been making progress). I've felt like there's just so much to do that it sometimes gets overwhelming. This is why, at the beginning of August, I decided to start a Bullet Journal. You can read more about the process on the creator's website, but the basic idea is that you just write down things as they happen and distinguish between tasks, events, and notes with little bullets. I bought a cheap unlined notebook at the dollar store because I wasn't sure I'd enjoy the process, and I didn't want to waste a lot of money, but I'll probably go for a Moleskine or something similar for my next journal.
On the very first page, instead of making an index, I gave my contact information and wrote a little legend to keep track of the different bullets and signifiers. I put the index at the back of my journal instead of at the front so that if I ran out of space, I'd be able to continue on earlier pages. I've also seen some people use multiple indexes at random points in their journal. That could work too, I suppose, but it seems confusing. Here's my first page, decorated with colourful doodles on a slow day at work:
The next spread is my monthly calendar and tasks. On the left side, I made a list of all the days in the month, with the date and day of the week, and then started to fill in the more important events I already had planned. One small change I've made since I scanned these pages is I put a little event bullet to the left of each date so I can check them off as the days go by, which makes it a little easier to see where I am in the month. For my September spread, I'll definitely give my days a bit more room! On the left side, I started listing all of the tasks I could think of that I wanted to accomplish in August. I keep looking back on these and attempt to tackle one each day. The especially important and urgent tasks, I mark with an asterisk (for example, Daphne's sweater, which I need to finish before she leaves for England at the end of the month).
Then, we get into the meat of the journaling. Each day is a series of bullets. Tasks are demarcated by empty boxes, events are unfilled circles, and notes are filled in smaller circles. Every morning, I write down the things I want to get accomplished and the events for the day, adding more as I think of them. I check off tasks as I complete them and events as they happen. If, by the end of the day, there is a task left unaccomplished, I migrate it to the next day (with a little arrow) or cross it out if it became irrelevant. For the future, I think I'll probably only migrate tasks when I change pages, since they're still visible until I turn the page. As you can see, I've been pretty good at getting stuff done this way! It feels unnerving to still have little unchecked boxes at the end of the day, and just so good to add in that little checkmark when a task is complete.
Once I have enough tasks (or events or notes) that are similar in nature, I migrate them to collections, which I note in the index. The ones I show in the image below are for Blog Ideas and Crafting Projects. Some other collections I've added since are: Books to Read, Movies to See, and Songs to Learn on the Ukulele. I also added a collection for Future Dates. One minor issue with the Bullet Journal system is that it's difficult to plan for events further in the future than just the current month. So, as things come up, I just add them to the master list of future events, and when I start a new month, I'll migrate them there. Easy!
I've also personalized it a little with some Dalek post-its. I have a black one to indicate the current month, and a blue one to bookmark which page I'm currently on.
So that's my bullet journal! I've only been at it for two weeks, but so far, I think I'm enjoying it a lot. I'll admit to spending a lot of time fooling around on the internet, trying to find the perfect bullet journaling system, but overall, I think I'm getting more done this way. I'll certainly give a progress report once I've been at it for a bit longer.
Labels:
art,
geekery,
journaling,
life
Subscribe to:
Comments (Atom)


